
Amish Pineapple Bars Recipe With Crumbly Topping
Amish pineapple bars bring sunshine to any occasion with a dessert that feels like pure comfort in every bite.
Passed down through generations, this treasured recipe has won hearts at potlucks, church gatherings, and celebrations across the country.
Sweet and satisfying, each square offers a delightful balance of tropical fruit and tender cake that melts in your mouth.
Perfectly portable and easy to serve, they're ideal for sharing at summer picnics or enjoying as an afternoon treat with coffee.
The simplicity of preparation means you can have a delicious homemade dessert without spending hours in the kitchen.
Golden, moist, and absolutely delicious, they disappear fast whenever they show up.
When you need something special that everyone will love, this classic recipe delivers exactly what you're looking for.
Why This Amish Pineapple Bars Stands Out
Essential Ingredients for Amish Pineapple Bars
Base Ingredients:Dry Ingredients:Optional Additions:Gear Up for Cooking Amish Pineapple Bars
Detailed Instructions For Amish Pineapple Bars
Heat Your Oven And Prep The Pan
Start by turning your oven to 350°F. Take a 9×13-inch baking pan and coat it with a thin layer of butter or cooking spray so the bars don’t stick when they’re done baking.
Cream The Butter And Sugar Together
In a large mixing bowl, combine 1/2 cup softened butter and 1 cup sugar. Use an electric mixer or mix by hand with a wooden spoon, beating them together for about 2 to 3 minutes until the mixture looks light and pale.
Add The Eggs One At A Time
Crack 2 large eggs into your bowl, adding them one at a time. After each egg goes in, beat the mixture well so it’s fully blended before adding the next one.
Once both eggs are in, stir in 1 teaspoon vanilla extract.
Mix Your Dry Ingredients
In a separate bowl, whisk together these ingredients for the dry mixture:
Set this bowl to the side for now.
Combine Everything Together
Here’s where the batter comes together. Alternating between the two bowls, add some of your dry mixture to the creamed mixture, then add some of the 2 cups drained crushed pineapple, and repeat until both are incorporated.
Stir gently until everything is just combined and no streaks of flour remain. If your bars benefit from nuts, fold in 1/2 cup chopped nuts at this point.
Transfer Batter To The Pan
Pour the entire batter into your prepared 9×13-inch pan and use a spatula or the back of a spoon to spread it into an even layer.
Bake The Bars
Place the pan in your preheated 350°F oven for 30 to 35 minutes.
The bars are ready when a toothpick poked into the center comes out clean or with just a few moist crumbs clinging to it.
Cool And Cut Into Squares
Take the pan out of the oven and let it sit on a counter or cooling rack until the bars reach room temperature.
Once fully cooled, cut them into squares and they’re ready to serve.
How To Improve Cooking Amish Pineapple Bars
Fresh Ideas to Change Up Amish Pineapple Bars
Serving Amish Pineapple Bars For Any Occasion
Practical Storage Ideas for Amish Pineapple Bars
FAQs
Can I use canned pineapple that’s not drained?
Drain your pineapple really well before mixing it in. Too much liquid makes the batter wet and affects how the bars bake.
What if I don’t have buttermilk or sour cream in the recipe?
This recipe doesn’t call for buttermilk or sour cream, so there’s nothing to substitute. The pineapple juice gives enough moisture.
Do I need to use both baking soda and baking powder?
Yes, both are in the recipe and work together to help the bars rise and get fluffy.
Can I skip the nuts?
Absolutely, nuts are optional. Leave them out if that works better for your family.
How do I know when the bars are done baking?
Insert a toothpick in the center. If it comes out clean with no wet batter, they’re ready.
What kind of pineapple works best?
Canned crushed pineapple is easiest and works great. Fresh pineapple works too, but crush it finely and drain it well.

Amish Pineapple Bars Recipe
- Total Time: 45-50 minutes
- Yield: 12 1x
Description
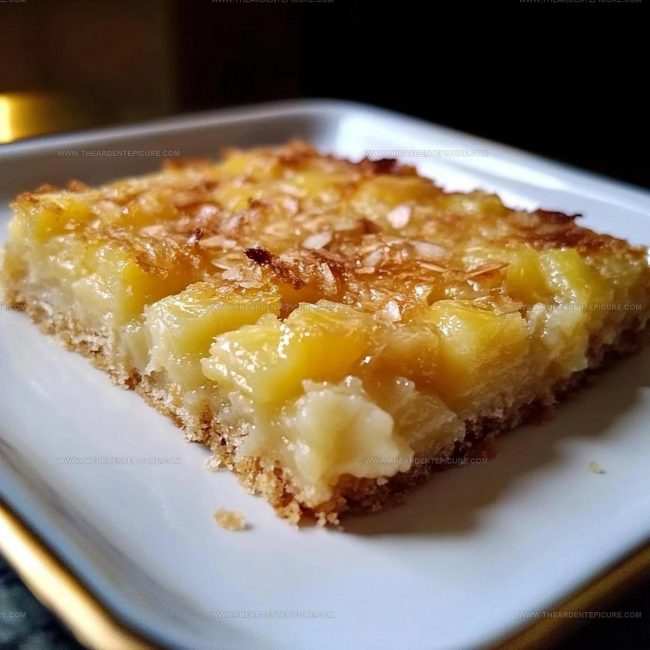
Pineapple bars are a simple dessert that combines a buttery shortbread base with a sweet pineapple filling and a light coconut topping that bakes together into something really satisfying. When you cut into these bars, the layers work perfectly together, giving you that contrast between the crispy edges and the tender middle that makes them worth keeping in your baking rotation.
Ingredients
Wet Ingredients:
- 2 cups crushed pineapple, drained
- 1/2 cup butter, softened
- 2 large eggs
- 1 teaspoon vanilla extract
Dry Ingredients:
- 2 cups all-purpose flour
- 1 cup sugar
- 1 teaspoon baking soda
- 1 teaspoon baking powder
- 1/2 teaspoon salt
Mix-ins:
- 1/2 cup chopped nuts
Instructions
- Heat your oven to 350°F and grease a 9×13-inch baking pan with butter or cooking spray.
- In a large bowl, combine 1/2 cup softened butter with 1 cup sugar, beating them together until the mixture turns light and fluffy, about 2-3 minutes.
- Add 2 large eggs one at a time, mixing well after each egg goes in, then stir in 1 teaspoon vanilla extract.
- In a separate bowl, whisk together 2 cups all-purpose flour, 1 teaspoon baking soda, 1 teaspoon baking powder, and 1/2 teaspoon salt.
- Alternate adding your dry ingredients and 2 cups drained crushed pineapple to the butter mixture, starting and ending with the dry ingredients, stirring until just combined.
- Fold in 1/2 cup chopped nuts if you’re using them for extra texture.
- Transfer your batter to the prepared pan, spreading it into an even layer across the bottom.
- Bake at 350°F for 30-35 minutes until a toothpick inserted in the center comes out clean.
- Let the bars cool completely in the pan before cutting them into squares for serving.
Notes
- Drain your crushed pineapple thoroughly in a fine-mesh strainer for at least 10 minutes so excess liquid doesn’t make the bars soggy or prevent them from rising properly.
- Add the dry ingredients in three additions alternating with the pineapple, stirring gently between each one, since overmixing toughens the crumb and results in dense bars.
- Let the bars cool completely in the pan before cutting; they’ll firm up as they cool, making clean squares that hold together instead of crumbling apart.
- For a dairy-free version, substitute the butter with coconut oil or vegan butter in equal amounts, and the bars bake up just as tender and moist.
- Prep Time: 15 minutes
- Cook Time: 30-35 minutes
- Category: Bars
- Method: Baking
- Cuisine: American
Nutrition
- Serving Size: 12
- Calories: 210 kcal
- Sugar: 15 g
- Sodium: 150 mg
- Fat: 9 g
- Saturated Fat: 5 g
- Unsaturated Fat: 3 g
- Trans Fat: 0.2 g
- Carbohydrates: 29 g
- Fiber: 1 g
- Protein: 3 g
- Cholesterol: 40 mg
Jacob Price
Recipe Developer and Baking Lead
Expertise
Small Batch Baking, Bread and Dough Basics, Texture and Timing Cues, Make Ahead Prep Plans, Budget Smart Shopping, Clear Step by Step Recipe Writing
Education
Jacob Price, Recipe Developer and Baking Lead, brings steady precision from Santa Rosa, CA. With formal culinary training from Kirkwood Community College, he focuses on small batch baking, bread basics, and texture driven timing that works in real home ovens. He created our “Rescue Lines” troubleshooting notes and visual baking checks to ensure recipes rise, crisp, and set exactly as they should. For Jacob, a great recipe is one that delivers flavor and confidence on the very first try.