Apple Crisp Shortbread Bars Recipe for Buttery Layers
Craving something sweet that feels like a warm hug on a cool afternoon?
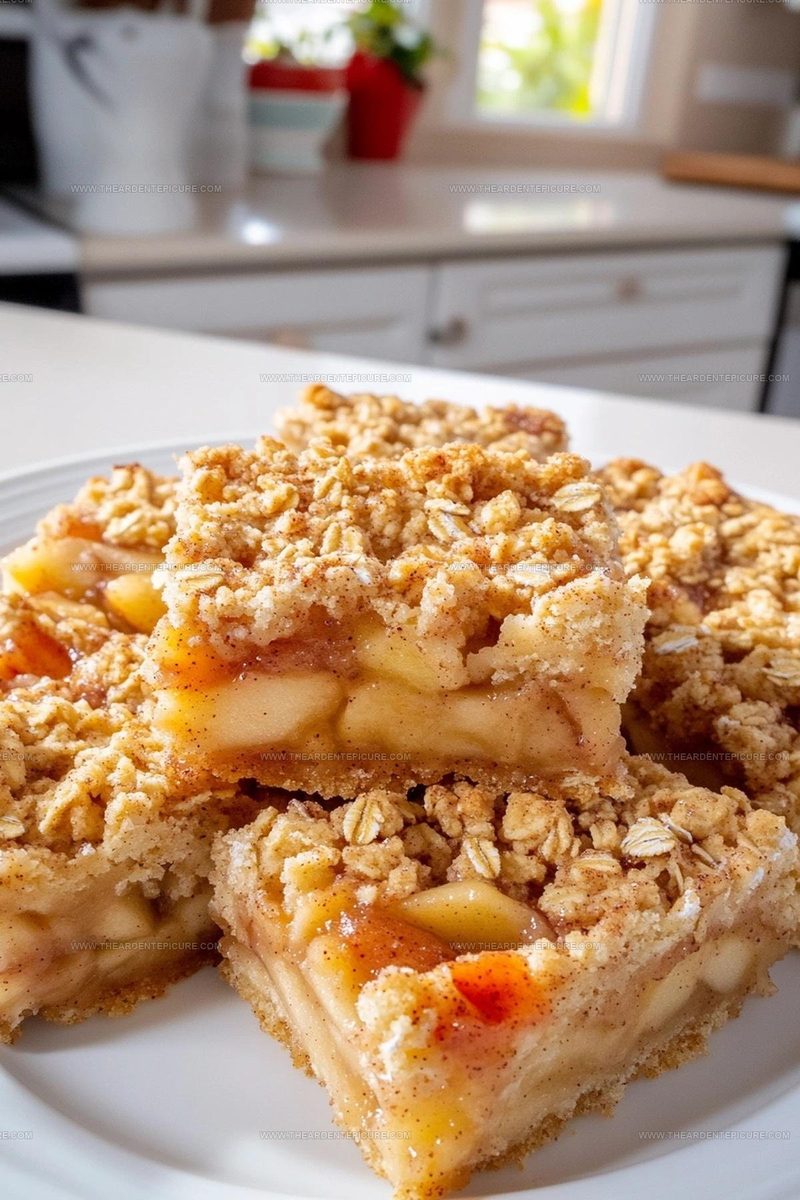
Apple crisp shortbread bars recipe brings all the comfort of a homemade dessert with layers that melt together beautifully.
It works perfectly for potlucks, coffee breaks, or simply when you need something delightful waiting in the kitchen.
You can have a pan ready in less time than most traditional desserts take to prepare.
When that golden top emerges from the oven and fills your home with incredible aromas, you'll know exactly why it's become such a beloved treat.
What Makes Apple Crisp Shortbread Bars So Satisfying

What Ingredients Go Into Apple Crisp Shortbread Bars
Base Layer Ingredients:Apple Filling Ingredients:Crisp Topping Ingredients:What Tools Help Keep Apple Crisp Shortbread Bars Prep Simple
Stepwise Guide For Apple Crisp Shortbread Bars
Prepare Your Pan And Heat The Oven
Get your oven going at 350°F and line an 8×8 or 9×9-inch baking pan with parchment paper so your bars don’t stick to the sides.
Make The Shortbread Base
In a mixing bowl, combine your dry ingredients for the base layer:
Cut 1/2 cup of cold butter into small pieces and work it into the flour mixture with your fingertips until the texture resembles coarse breadcrumbs.
Press this mixture firmly into the bottom of your prepared pan, creating an even layer. Slide it into the oven and bake for 12 minutes until it turns light golden.
Prep Your Apples
While your base bakes, peel and thinly slice 2 large apples. Once sliced, toss them in a separate bowl with:
Stir everything together gently so each apple slice gets coated with the mixture.
Create The Oat Topping
In another bowl, mix together your crispy topping ingredients:
Use your fingers to blend the cold butter into the dry ingredients until the whole mixture becomes crumbly and resembles coarse sand.
Assemble The Bars
Pull your partially baked crust from the oven.
Spread your apple mixture evenly across the warm shortbread layer. Sprinkle the oat topping over the apples in an even distribution, covering all the fruit so it bakes evenly.
Bake Until Golden
Return the pan to the oven and bake for 35 to 40 minutes. The topping should turn golden brown and the apples underneath should bubble slightly around the edges.
This is your signal that everything is cooked through.
Cool And Cut
Remove the bars from the oven and let them sit at room temperature until they cool completely.
This helps them set up properly so when you cut them into bars, they stay together nicely instead of falling apart.
What Makes Apple Crisp Shortbread Bars Better
Style Options for Apple Crisp Shortbread Bars
Delicious Pairings For Apple Crisp Shortbread Bars
Everyday Storage Suggestions For Apple Crisp Shortbread Bars
FAQs
Can I use a different pan size?
Yes, an 8×8-inch pan works best for the thickness shown in the recipe, but a 9×9-inch pan also works; just watch that your bars bake evenly and adjust the baking time by a few minutes if needed.
What kind of apples should I use?
Granny Smith or Honeycrisp apples hold their shape nicely while baking, but any baking apple works for you; just pick ones that aren’t too soft.
Do I need to peel the apples?
No, the skin keeps the apples intact during baking and adds texture to your bars, so leaving them on is fine.
Can I make these without cornstarch?
Cornstarch helps thicken the apple filling so it doesn’t get watery, but if you don’t have it, use 1 tablespoon of flour instead.
Why is my topping not crispy?
Make sure the oat mixture stays crumbly and doesn’t clump together before baking; too much mixing can make it dense instead of crispy for you.
How do I know when the bars are done?
The topping should be golden brown and the apple filling should bubble slightly around the edges when ready.
Apple Crisp Shortbread Bars Recipe
- Total Time: 1 hour 2 minutes
- Yield: 8 1x
Description
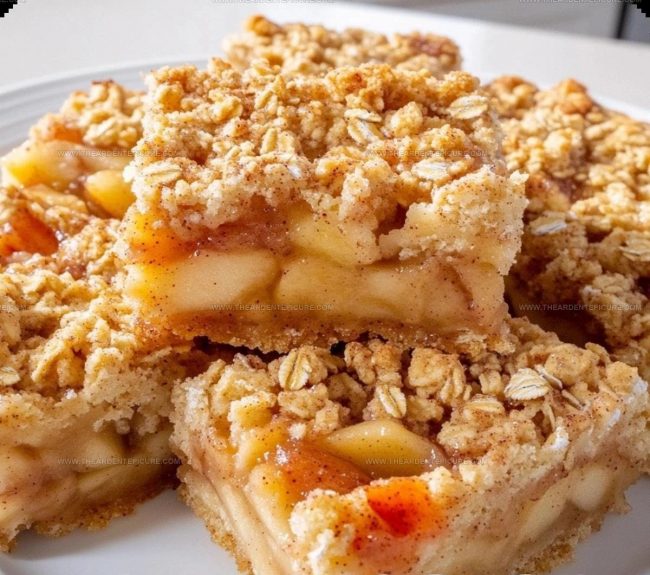
These apple crisp shortbread bars bring together a buttery shortbread base, spiced apples, and a crunchy oat topping that you’ll find yourself reaching for again and again. Baking them takes minimal effort since the filling comes together quickly while your oven does most of the work.
Ingredients
Base:
- 1 1/4 cups all-purpose flour
- 3/4 cup cold unsalted butter
- 1/4 teaspoon salt
- 3/4 cup rolled oats
Filling:
- 2 large apples, peeled and thinly sliced
- 1 tablespoon cornstarch
- 1/2 teaspoon cinnamon
Sweeteners:
- 1/2 cup granulated sugar
- 1/2 cup brown sugar
- 1/2 teaspoon vanilla extract
Instructions
- Heat your oven to 350°F and prepare an 8×8 or 9×9-inch baking pan by lining it with parchment paper.
- Combine 1 cup of all-purpose flour, 1/2 cup granulated sugar, and 1/4 teaspoon salt in a mixing bowl.
- Cut 1/2 cup of cold unsalted butter into the flour mixture until the texture resembles coarse crumbs.
- Press this buttery mixture firmly into the bottom of your prepared pan and bake for 12 minutes at 350°F.
- While the crust bakes, toss your 2 large peeled and thinly sliced apples with 1/2 cup brown sugar, 1 tablespoon cornstarch, 1/2 teaspoon cinnamon, and 1/2 teaspoon vanilla extract in a separate bowl.
- In another bowl, mix 3/4 cup rolled oats, 1/4 cup all-purpose flour, and 1/2 cup brown sugar together.
- Add the remaining 1/4 cup of cold unsalted butter to your oat mixture and work it together with your fingers until everything becomes crumbly.
- Remove the crust from the oven and spread your apple mixture evenly across the top.
- Distribute the oat topping over the apples in an even layer, then bake for 35 to 40 minutes at 350°F until the topping turns golden brown and the apple filling bubbles around the edges.
- Let your bars cool completely at room temperature before cutting them into squares.
Notes
- Press your shortbread crust firmly and evenly into the pan so it bakes uniformly and holds the filling without crumbling when you slice.
- Toss your apples gently with the brown sugar and cornstarch mixture just before layering to prevent them from releasing too much liquid and making the bars soggy.
- Sprinkle your oat topping in an even layer so it bakes consistently and creates a crispy, golden texture throughout rather than having thick and thin spots.
- If you’re baking for a gluten-free diet, swap regular flour for a 1-to-1 gluten-free blend and use certified gluten-free oats, keeping all other ingredients and baking times the same.
- Prep Time: 15 minutes
- Cook Time: 47 minutes
- Category: Bars
- Method: Baking
- Cuisine: American
Nutrition
- Serving Size: 8
- Calories: 258 kcal
- Sugar: 14 g
- Sodium: 70 mg
- Fat: 12 g
- Saturated Fat: 7 g
- Unsaturated Fat: 5 g
- Trans Fat: 0.1 g
- Carbohydrates: 36 g
- Fiber: 3 g
- Protein: 2 g
- Cholesterol: 30 mg
Wanda Hamilton
Founder and Recipe Editor
Expertise
Bold Weeknight Cooking, Pantry Powered Meals, Sauce and Spice Building, Seasonal Ingredient Swaps, Recipe Testing and Troubleshooting, Food Photography and Simple Styling
Education
- Degree: Associate of Applied Science in Culinary Arts
- Focus: Core culinary skills built through practical kitchen training, with a strong foundation for real service work.
National Registry of Food Safety Professionals (NRFSP)Wanda Hamilton, Founder and Recipe Editor, cooks from Savannah, GA with a “big flavor, low fuss” mindset. Trained in Culinary Arts at Bellingham Technical College and certified in food safety through the NRFSP, she blends professional skill with everyday practicality. Wanda is known for smart finishing touches that elevate a dish in minutes, along with rigorous testing standards and clear visual cues that remove the guesswork. Her goal is simple: make every meal feel like a small but satisfying upgrade to your day.